by Matt | Apr 20, 2013 | Projects
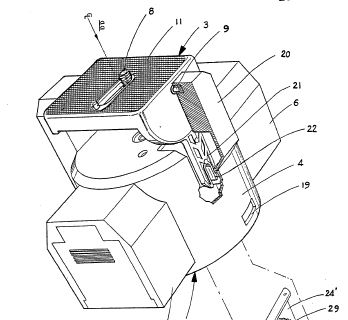
The Bescor MP-101 patent....
by Matt | Oct 6, 2012 | Projects
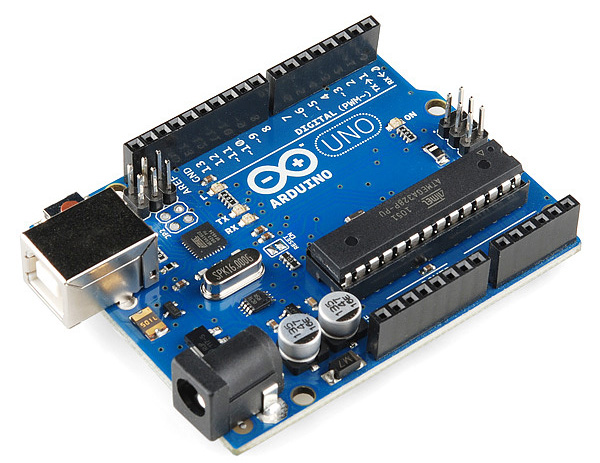
Update Oct 20, 2012: I’m holding this project off. I had a few questions about the pan/tilt speed of the Arduino remote vs the original remote. The pan/tilt speed is reduced, but because we’re changing the original values designed for the motors, it could cause the motors to stall. We’ve been using the Arduino Uno and Bescor MP-101 for a while now, and I’ve learned a lot, but now I’m ready to develop a Bescor Joystick Remote without the Arduino Uno. If things come together with a little help and support, I want to implement a wireless solution using a smart phone. In the meantime, I want to thank those of you for letting me see your cool pan/tilt projects. ...

by Matt | Aug 14, 2012 | Projects
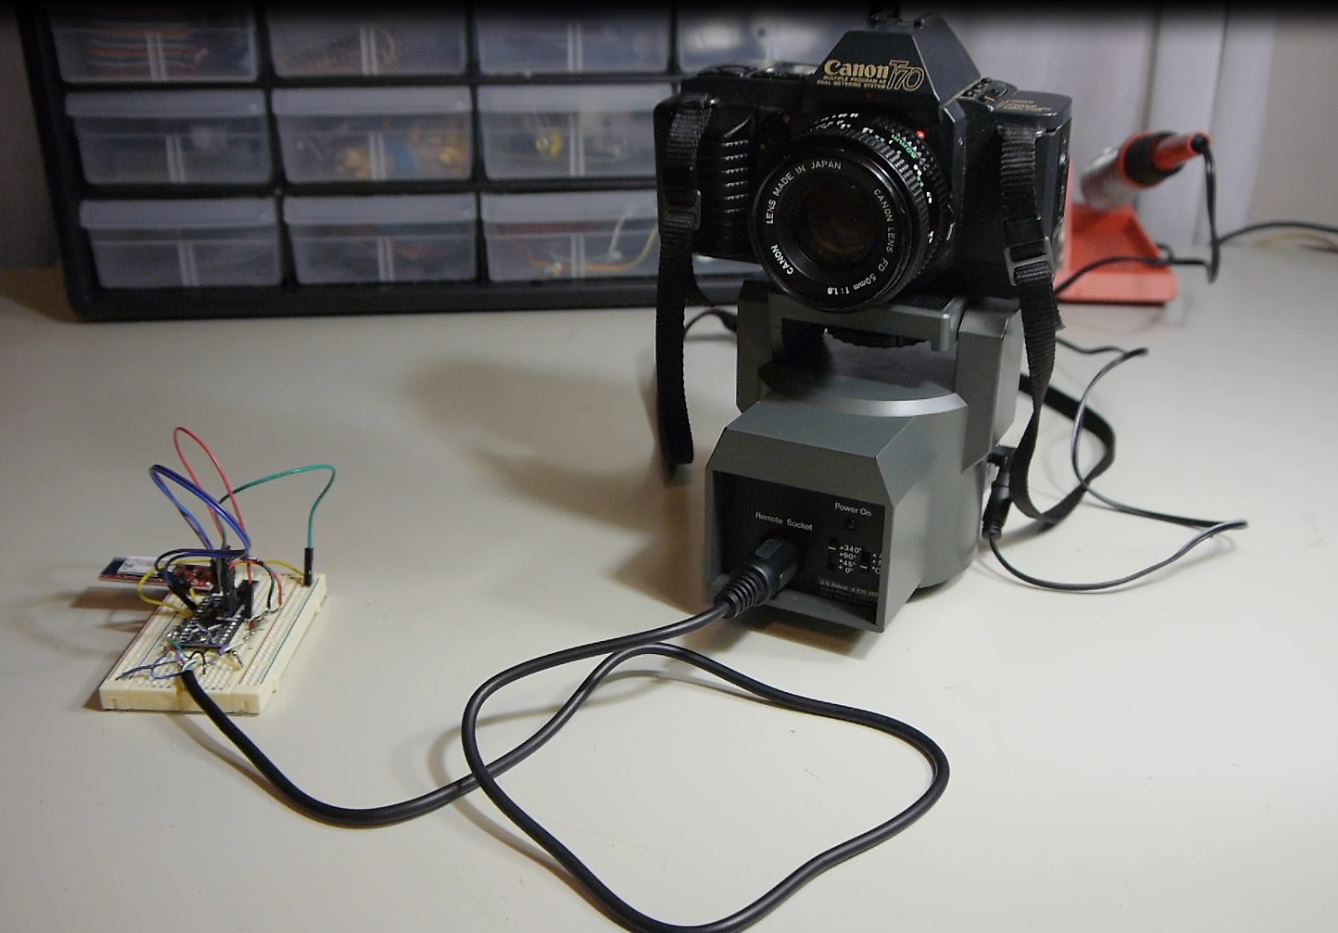
This code is slightly modified to keep the motors from stalling when they run back and forth, but it appears the problem is something to do with motors going to ground. /* * * This program controls the Bescor MP-101 Pan/Tilt system using the Wii Nunchuck * * Copyright (c) 2012 Matt Alford, http://www.protechy.com * Date: Aug 14, 2012 * * Nunchuck Library http://playground.arduino.cc/Main/WiiChuckClass * */ #include "Wire.h" #include "WiiChuck.h" // The library used by the Nunchuck #define left 11 //Pin 11 controls left pan #define right 3 //Pin 3 controls right pan #define up 10 //Pin 10 controls up tilt #define down 9 //Pin 9 controls down tilt WiiChuck chuck = WiiChuck(); int varx = 0; // The x-axis variable to store the value coming from the Nunchuck int vary = 0; // The y-axis variable to store the value coming from the Nunchuck int absx = 0; // The x-axis variable used to store the absolute value. int absy = 0; // The y-axis variable used to store the absolute value. void setup() { Serial.begin(115200); // Opening the serial port //TCCR2B = TCCR2B & 0b11111000 | 0x07; //Adusting PWM frequencies for testing pins 11 and 3 //TCCR1B = TCCR1B & 0b11111000 | 0x05; //Pins 9 and 10 // nunchuck_setpowerpins(); // use analog pins 2 & 3 as gnd & pwr (uncomment to use WiiChuck) chuck.begin(); chuck.update(); } /* //To power the WiiChuck Adapter static void nunchuck_setpowerpins() { #define pwrpin PORTC3 #define gndpin PORTC2 DDRC |= _BV(pwrpin) | _BV(gndpin); PORTC &=~ _BV(gndpin); PORTC |= _BV(pwrpin); delay(100); // wait for things to stabilize } */ void loop() {...
by Matt | Jun 23, 2012 | Projects
New code here v2.4 On v2, I didn’t assign all the directional wires PWM pins, and it caused me to use the purple wire as speed which was unnecessary. In v2.1 the speed and direction come from the direction wires. Also, I learned from this link the Bescor goes to ground at limit which means it will stop moving overtime when it goes in two directions. By using 1.5k resistors on each end of the four wires, the Bescor doesn’t reach the ground limit. White = up Blue = down Yellow = left Green = right White = pin 10 Blue = pin 9 Yellow = pin 11 Green = pin 3 The Bescor had a lot of electrical noise, so I changed the PWM frequency using this code. /* * * This program controls the Bescor MP-101 Pan/Tilt system using the Wii Nunchuck * * Copyright (c) 2012 Matt Alford, http://www.protechy.com * Date: June 23, 2012 * * Nunchuck Library created by Gabriel Bianconi, http://www.gabrielbianconi.com/ * */ #include "Wire.h" #include "ArduinoNunchuk.h" // The library used by the Nunchuck #define left 11 //Pin 12 controls left pan #define right 3 //Pin 10 controls right pan #define up 10 //Pin 9 controls up tilt #define down 9 //Pin 8 controls down tilt ArduinoNunchuk nunchuk = ArduinoNunchuk(); int varx = 0; // The x-axis variable to store the value coming from the Nunchuck int vary = 0; // The y-axis variable to store the value coming from the Nunchuck int absx = 0; // The x-axis variable used to store the absolute value. int absy = 0; // The y-axis...
by Matt | Jun 1, 2012 | Projects
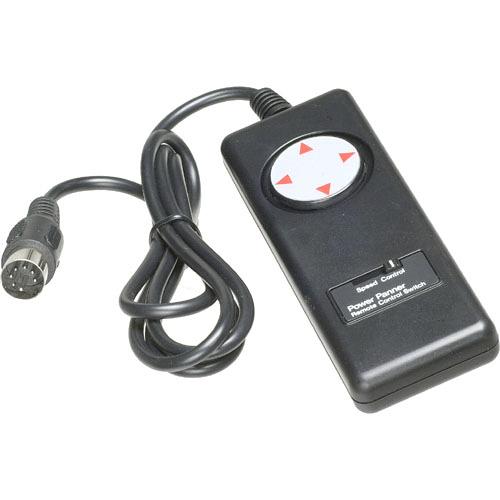
This is a followup of a better way to control the Bescor using the Arduino UNO from this tutorial (Update: Working on a new setup and hopefully have the code up soon.) Here’s a breakdown of how the original controller works . White = up Blue = down Yellow = left Green = right Black = Ground Red = 5v Purple = Speed When a button is pressed, an electrical current passes through one of the directional wires to the Bescor. The red wire is 5v and sends the current through the slider that changes the voltage and returns to the Bescor through the purple wire. I’m still experimenting, but here’s how I connected the wires to the Arduino using the original Bescor controller White = pin 8 Blue = pin 9 Yellow = pin 10 Green = pin 12 Purple = pin 3 Without looking inside the Bescor, I didn’t know if this is the best setup. I tried connecting the direction wires and ground to control the speed, but it didn’t work. The solution was to use the purple wire as my speed control and change the voltage like on the Bescor controller slider using PWM. The direction can be controlled by setting the digital pins HIGH “on” or LOW “off”. Here’s the code: /* * * This program controls the Bescor MP-101 Pan/Tilt system using the Wii Nunchuck * * Copyright (c) 2012 Matt Alford, http://www.protechy.com * Date: April 19, 2012 * * Nunchuck Library created by Gabriel Bianconi, http://www.gabrielbianconi.com/ * */ #include #include "ArduinoNunchuk.h" // The library used by the Nunchuck #define left...