In this tutorial, I’ll show you how to install the Arduino Software and drivers on a Window 7 64-bit computer.
Step 1: Download and Installation
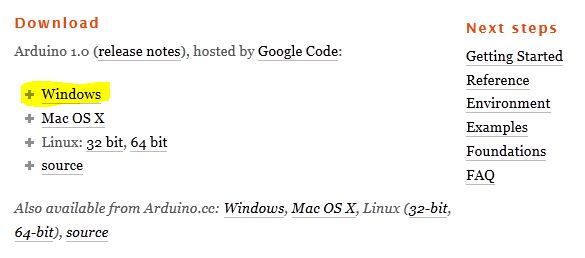
Download the Arduino Software here
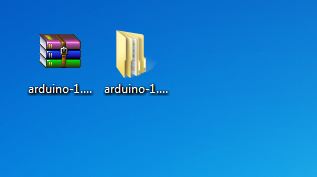
Download and extract the zip file in any location. I put mine on the desktop.
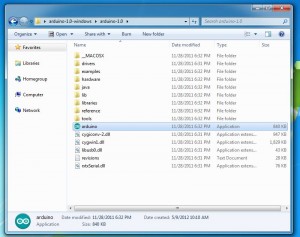
Open the arduino-1.0 folder. This folder contains all the files and drivers needed to upload programs “sketches” to the Arduino.
Step 2: Driver Installation
I’ll show you how to manually install the Arduino Uno drivers on a Windows 7 64-bit computer. Generally, the older versions of the Arduino can be installed on there own.
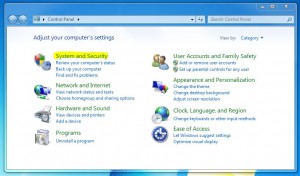
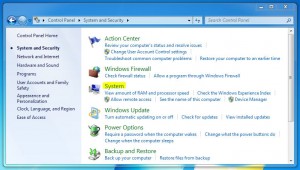
Click on start and go to control panel and click on System and Security.
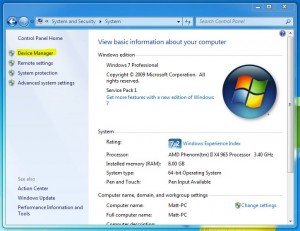
Click on System
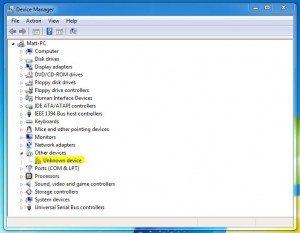
Click on Device Manager
Let’s plug in the Arduino using the usb cable and see the Arduino as a unknown device.
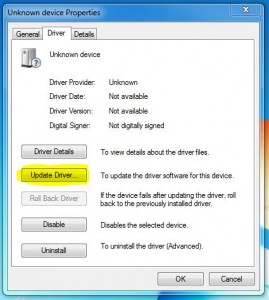
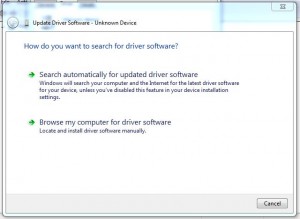
Right click on the Unknown device and click properties and select the Driver tab and click Update Driver.
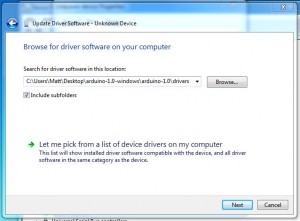
Click on Browse my computer for driver software
Browse to the Arduino folder we unzipped and select the drivers folder
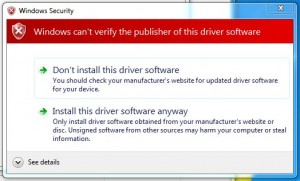
Click Next and a security window may popup, but we want to install the driver.
The Arduino should be listed under Ports in device manager after we installed the driver.
Step 3: Running and Testing the Arduino Software
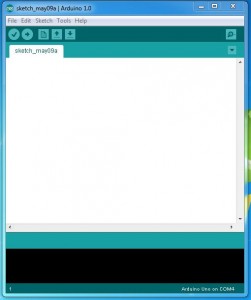
Back in the Arduino folder, click on the Arduino blue icon.
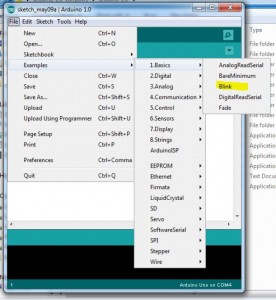
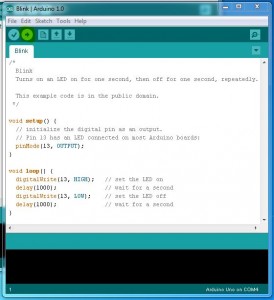
Let’s upload a example sketch to the Arduino. Click on File, Examples, 1.Basics and click Blink.
While the Arduino is plugged in to the computer via usb, make sure the Arduino Uno board is selected under Tools – Board. Finally, upload the blink sketch to the Arduino by clicking on the arrow button.
The sketch should upload to the Arduino without errors. On the Arduino, a led will start to blink on and off for each 1000 milliseconds or 1 second.
I hope this tutorial has helped you. I have learned so much about programming and learning about electrical engineering through the Arduino. If you need any help with this tutorial, please contact me or leave a comment.
Coming soon in my next tutorial, I’ll show you how to control a DC motor using the Arduino Motor Shield R3 and Wii Nunchuck controller.

Step 2 at bottom. Windows tells me the USB driver is up to date and does not accept the driver for the Arduino UNO. I have Win 7 64-bit on a Dell.
In the drivers folder, try selecting ArduinoUNO.inf or Arduino UNO REV3 file.
Before begin step 3
In the properties popup of “Arduino Uno (COM3)” in the device status textbox:
Windows cannot initialize the device driver for this hardware (code 37)
Using Win 7 64 bit on a Toshiba Satellite.
This might help. http://arduino.cc/forum/index.php/topic,118440.0.html
I haven’t tried it, but it could be easier to install. Also, make sure to the main driver folder is selected and not the FTDI USB Drivers.